To guarantee vibrant spring colour, understanding tulip bulbs when to plant canada comes down to a strict biological requirement: bulbs need to go into the ground during autumn to receive 10 to 14 weeks of cool winter temperatures. This prolonged chilling process triggers the formation of the internal flower bud while allowing a sturdy root system to develop before ground frost locks the soil.
Timing your planting before the deep freeze sets in mimics the natural cycle these perennials depend on to thrive. Waiting too late risks frozen soil that halts root growth, while planting during unseasonable warmth can trick bulbs into sprouting green foliage prematurely.
Getting your hands in the soil during the crisp days of October and November creates the foundation for that show-stopping early spring display.
Why Autumn Soil Temperatures Dictate Your Spring Display
Spring-flowering species operate on delayed gratification. Once tucked underground, bulbs quietly expand their roots throughout the cool autumn weeks, soaking up available moisture and establishing anchorage.
“The bulbs of spring-blooming plants need to be in the ground now, so they can go through a cooling process in the winter,” said David Trinklein, horticulture specialist for University of Missouri Extension. “By planting in the fall, you make sure that the bulbs are exposed to 10-14 weeks of cool weather.”
Without those consecutive weeks of low temperatures, tulips cannot complete their developmental cycle. If bulbs miss their chilling window, the resulting plants produce stunted stems or fail to generate flower buds altogether.
Evaluating Your Soil and Drainage Capacity
Tulips demand free-draining soil to prevent rot during wet autumn rains and the early spring thaw. If sitting in pooled water beneath the snowpack, dormant bulbs quickly succumb to fungal decay and turn mushy.
A simple percolation test reveals whether your garden bed provides suitable drainage before you start digging deep trenches:
- Dig a test hole 12 inches deep in your intended planting location.
- Fill the hole with water and allow it to drain completely.
- Refill the hole with water and record the water depth.
- Check the depth again after 15 minutes, then multiply the amount drained by four to calculate the hourly drainage rate.
An ideal drainage rate measures roughly 2 inches per hour. If your soil drains less than 1 inch per hour, mix in generous amounts of compost or well-decomposed organic material to loosen dense dirt and elevate aeration.
Planting Depth and Spacing Specifications
Setting your bulbs at the correct depth protects them against severe freeze-thaw cycles and prevents root action from heaving them out of the bed.
| Planting Factor | Recommended Target |
|---|---|
| Planting Window | October through November (before frozen ground) |
| Required Cold Exposure | 10 to 14 weeks of chilling temperatures |
| Planting Depth | 2 to 3 times the height of the bulb (roughly 5 to 6 inches) |
| Bulb Spacing | 6 to 8 inches apart |
| Drainage Benchmark | 2 inches per hour |
| Fertilizer Type | Bone meal (high phosphorus, low nitrogen) |
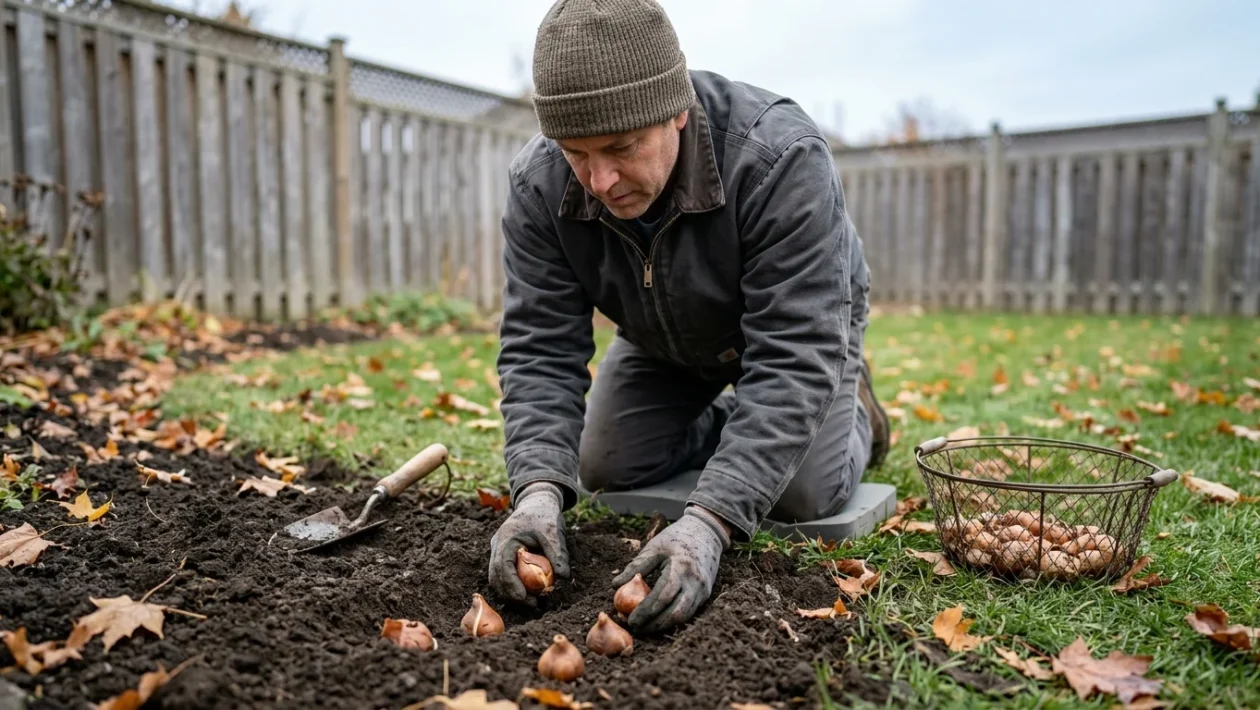
Position each bulb firmly at the base of the hole with the pointed end facing upward. If you encounter bulbs with unusual shapes, setting them slightly on their side still allows the emerging shoot to navigate naturally toward the surface.
Step-by-Step Guide to Planting Tulip Bulbs
Achieving dense, uniform spring flowers requires methodical bed preparation and careful bulb selection.
- Select prime stock: Choose bulbs that feel dense, dry, and plump. Discard any specimens that appear withered, shrivelled, or soft, as these traits indicate underlying disease or desiccation.
- Excavate to depth: Dig individual holes or wide planting trenches roughly 5 to 6 inches deep, ensuring the trench bottom provides loosened earth for easy root growth.
- Incorporate root-building nutrients: Mix bone meal into the excavated soil at the base of the trench. Its high phosphorus and moderate potassium content encourage strong root growth without introducing excess nitrogen that could burn sensitive tissues.
- Position and backfill: Space bulbs 6 to 8 inches apart, cover them completely with amended soil, and gently firm down the surface to remove large air pockets.
- Water thoroughly: Water the planting bed directly after backfilling to settle the soil around the bulbs, relying on regular autumn rainfall thereafter.
Busting the Fertilizer Myth: Avoid High Nitrogen in Autumn
A widespread gardening myth suggests dosing newly planted bulbs with heavy general-purpose fertilizers right before winter. In reality, fertilizers packed with high nitrogen can burn nascent root tips and stimulate soft leaf growth right when the plant must head into dormancy.
Applying low-nitrogen, high-phosphorus amendments like bone meal ensures that energy focuses entirely on sub-surface root systems rather than unseasonal top growth.
This targeted root nourishment allows the bulb to anchor deep beneath the frost line, ready to shoot up vibrant, colourful blossoms the moment warmer spring air returns.
💚 Have you started planting your spring bulbs this season?
✨ Share your favourite tulip varieties and planting tips with us below!
📱 Pass this guide along to your fellow gardeners preparing their beds for winter.
👇 Leave a comment below with your autumn garden progress!